Installation (Module)
- Install it through Joomla Extension Manager
- Go to Extensions > extensions manager
- Attach file download module and upload
Settings

-
Type menu - Select type menu (Standart menu, Virtuemart 3 categories)
Parent Category -Select the parent category to list as menu.
Sublevel - Sublevels to show
Show category image - Show VM category image (Y/N)
-
Select Menu , Start Level , End Level , Show Sub-menu Items - Standard Features
Joomla menuSelect menu – select a menu in the list
Side menu - Side menu (left or right)
Icon menu - Choice Icon menu
Images or Icon-fonts - Choice images in menu items (Images/Icons or Icon-fonts)
Background menu - Background menu and button menu
Mouse over - Background menu and button on mouse over
Color border - Color border
Color font submenu - Color font submenu
Add to image (icon) to menu item ("Standart menu")
Menu Manager: Menu Items - Edit Menu Item – Link Type – Link image
Add any icon or image

-

-
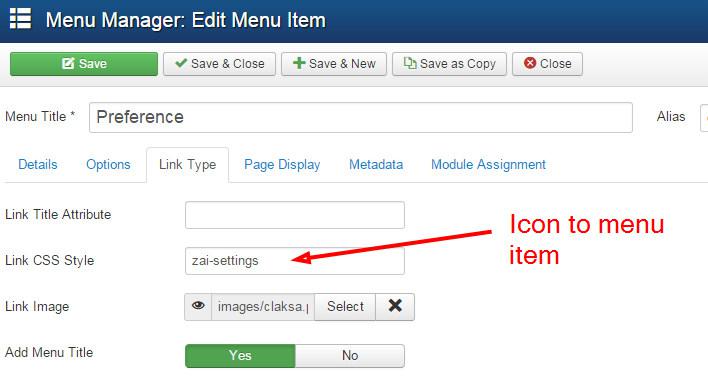
Add to icon to menu item ("Standart menu")
Menu Manager: Menu Items - Edit Menu Item – Link Type:
<
-Link CSS Style - Add any icon (See "Demo font icons") 
Basic Option
Set Google Font? - Load a Google font for module
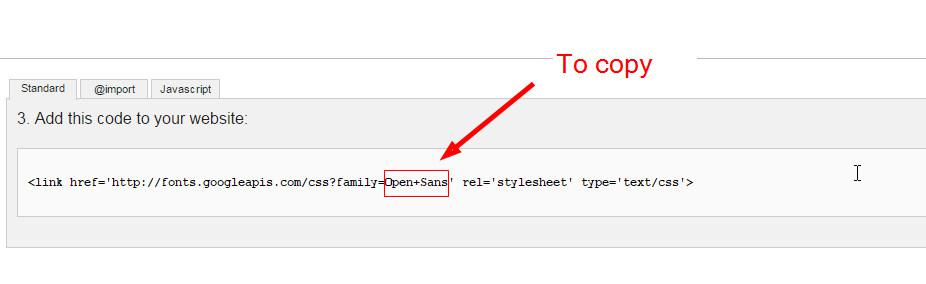
Google Font Name - Example: Open+Sans or Source+Sans+Pro. See below for how to use the google font.Use google fonts:
See all google fonts:
http://www.google.com/fontsAnd choose your favorite font:
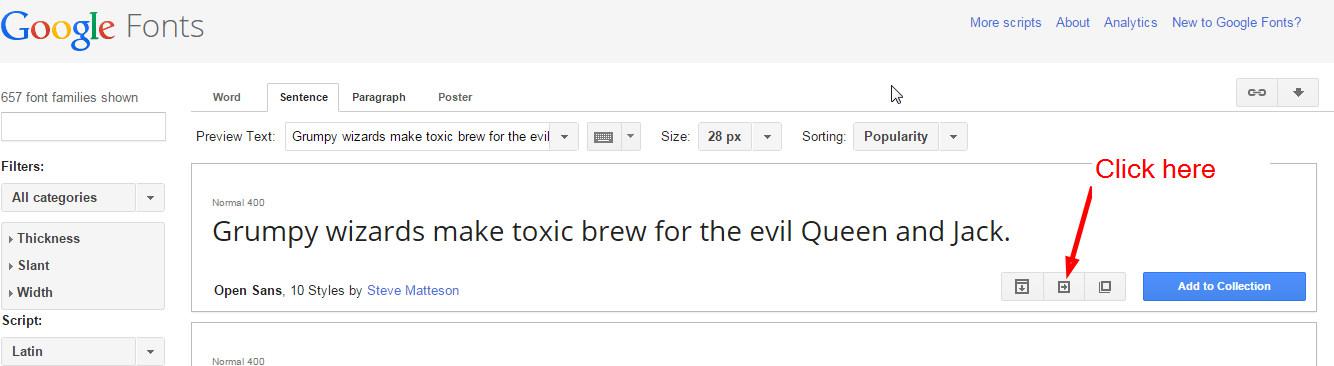
Click to “quick-use”

Greate a optimal module position:
Unfortunately, due to the vast number of templates for Joomla, this question cannot be answered
universally. So the best method for optimal results is to create a own (optimal) module position.
This tutorial will show you how to achieve this with in less than 3 minutes.
This tutorial assumes that your website is already online and you're accessing it with a FTP client.
Step 1:
Login to your webspace with FTP and change to your template folder ( /templates/*YourTemplate*/
). In this tutorial, we will be creating (as an example) a additional module position in joomla 2.5's
beez2 template, however, this method works for all versions of Joomla and for all templates.
You can now see the content of your template folder. The two files that need to be edited are marked
in the picture below.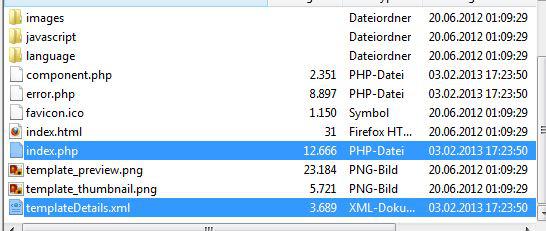
Step 2:
Now edit with a UTF8 aware text editor (NOT word or wordpad) the file 'templateDetails.xml'
(depending on your FTP client and editor, you need to download the file first to your local computer
and upload it again after editing).
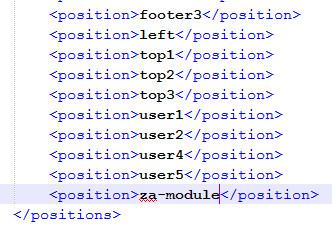
Look for the section <positions> , this section defines all available module positions of your
template. Now create a additional module position by ading the line
<position>*Positionname*<position> as shown in the picture (we chose the module position name
extrobgs for this example, you can of course use your own module position name). Save the file andupload it again to your webspace.
Step 3:
Next, edit the file index.php the same way like in step 2.
Look for the <body> Tag and add a div element immediately after it (see picture below). Within the
opening and closing div tag, add the Joomla Tag <jdoc:include type="modules"
name="*Positionname*" /> (replace *Positionname* with your the name you chose). This Tag will
display the actual module content, in this case, it will display the Za Sidebar menu. Save your file
and upload it back to your webspace.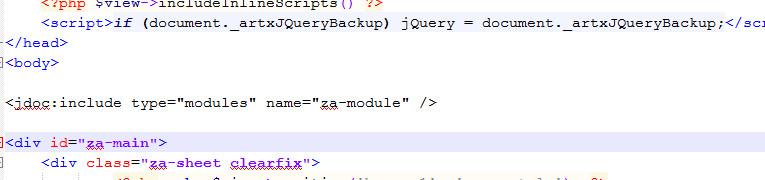
Step 4:
As last step, go to the backend of your Joomla site and publish the Za Sidebar menu in the module position you just created. Now, you will see the module menu in your sites frontend.
P.S.
If you will like our extension, to improve the quality of our service, please leave your review